


Disaster Recovery in 5 Easy Steps!
Every service provider aims to deliver 99.99% uptime, a noble goal indeed. However, reality proves that outages can and do occur from time to time. Whether it be scheduled maintenance, network failures, DDoS attacks or just a clumsy tech who stepped on a cable (yep, you read it right) , downtime will rear its ugly head in many forms.
Last week, a client from one of our sister companies had a networking failure at their data center. Servers went down, websites were unreachable and this client’s clients got upset. The technical staff at the data center were confused and unable to troubleshoot the cause of this networking crisis, let alone provide an estimated time for the fix.
The client decided to wait 30 minutes before taking actions. While he was busy calming his clients, the client was wise enough to have laid the groundwork of JetBackup’s disaster recovery feature to play its role.
What is disaster recovery? “A disaster can be anything that puts an organization’s operations at risk… from a cyberattack, equipment failures, or even natural disasters.”
As a leading backup software provider for the hosting industry we knew that DR mode MUST be included in JetBackup. The “Disaster Recovery” mode was created in order to provide a real effective solution for restoring cPanel accounts/websites from, well … a disaster.
Keep the following steps at hand in case you face a disaster and need a quick, stable and business saving recovery:
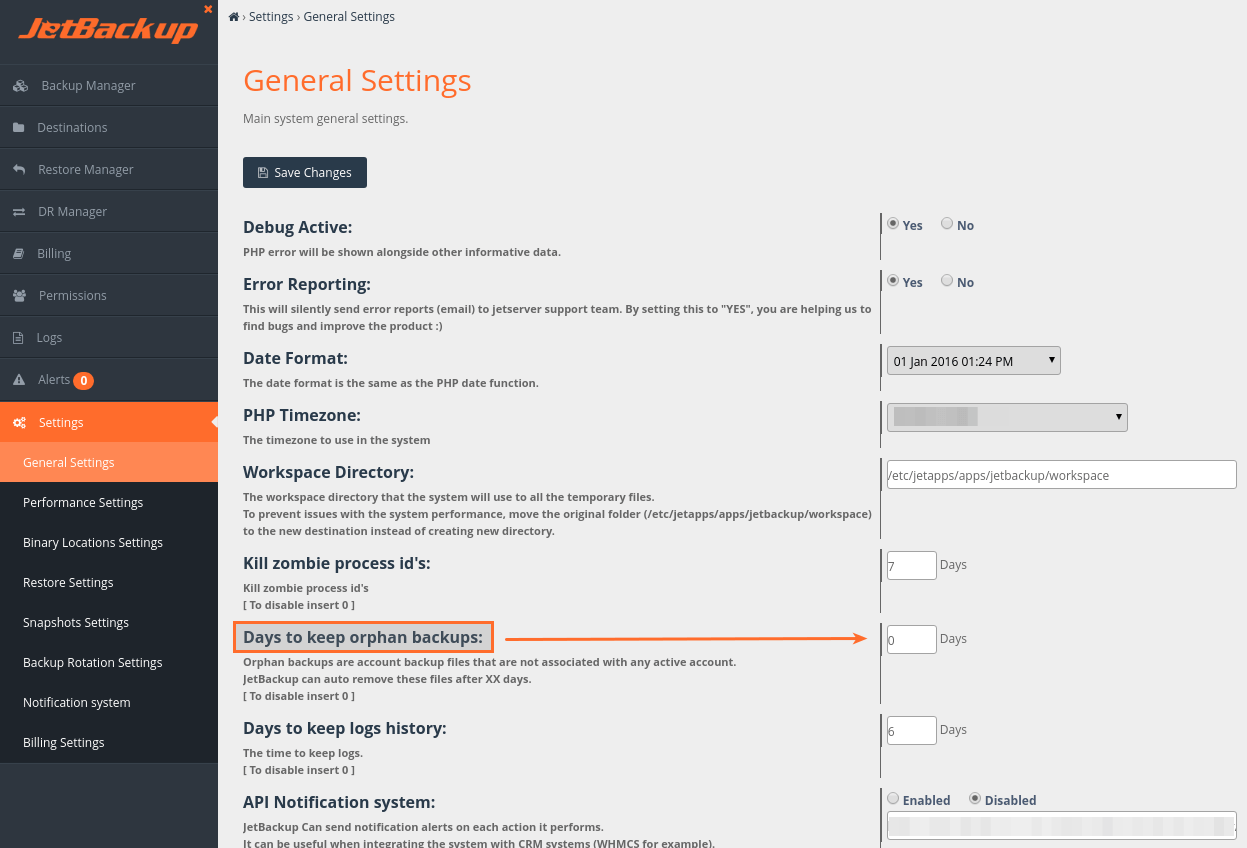
1. As you are about to connect, from a different server, to a server containing backups you do not want the disaster recovery server deleting them as orphans. So, go to settings → General Settings and make sure “Days to keep orphan backups” is set to 0 (which means never delete).
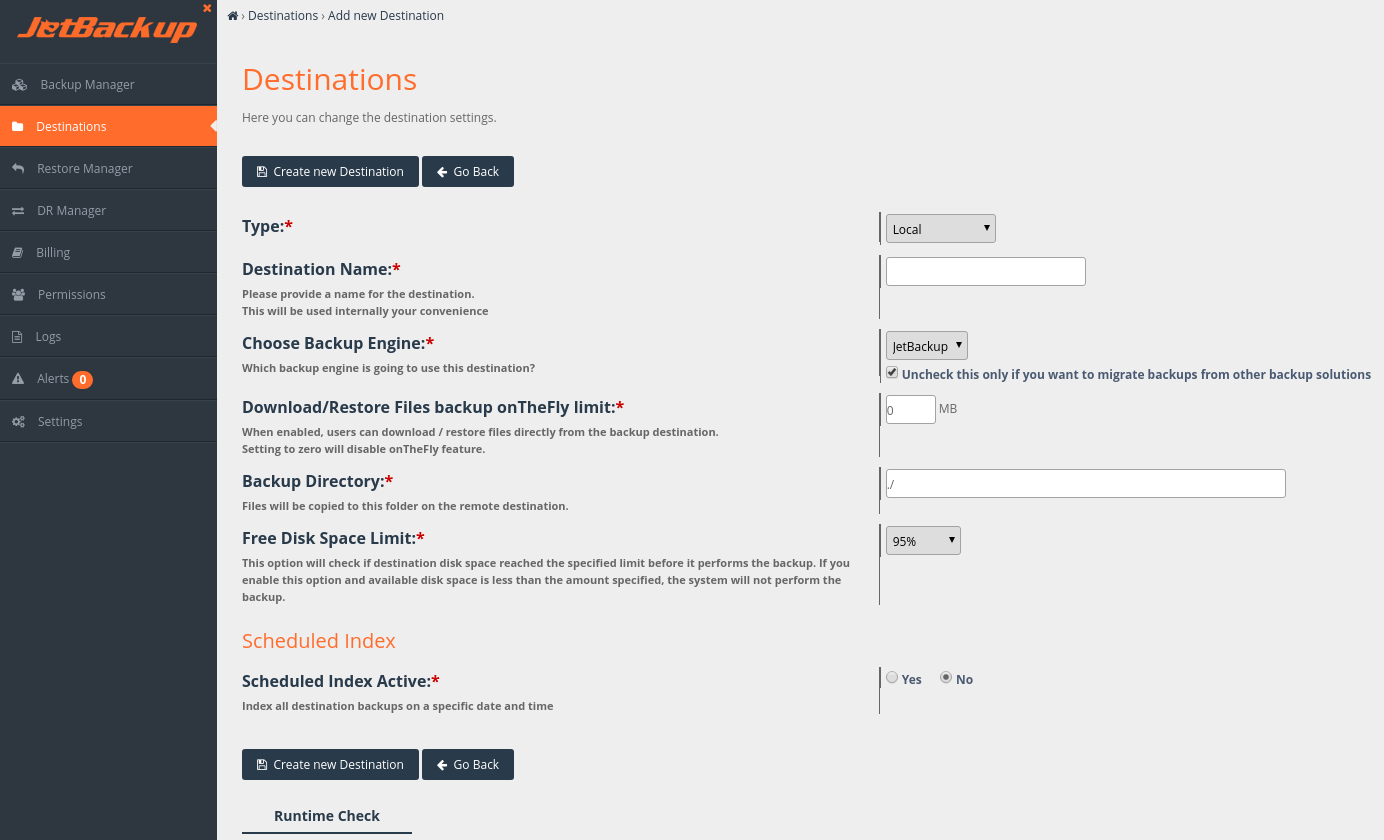
2. Set up a destination containing your old backups: Go to Destinations → Add new destination and enter in the new destination’s details.
3. Go to Restore Manage → Disaster Recovery → Restore System Configurations. Click the ![]() icon in relation to your disaster recovery destination and when the next screen loads, click on the restore
icon in relation to your disaster recovery destination and when the next screen loads, click on the restore ![]() icon under options.
icon under options.
4. Go back to the disaster recovery page and make sure that you can see all of your old accounts.
5. Select all the accounts you want to restore and click “add to restore queue”.
In this case, “laying the groundwork” was as easy as following these exact 5 steps. As time passed and the data center problem did not resolve itself, all that needed to be done was changing DNS/A records to the new up and running server.
Instead of being down for over 5 hours (which was the final outage time) , our exceedingly satisfied client was offline for less than 1.5 hours! (that includes the 30 minutes the client waited before initiating the disaster recovery plan)
Don’t wait until a disaster knocks on your door. Install JetBackup today! and have the peace of mind that you can recover from any disaster that comes your way!
